
Builders' Forum |
|
| ↓ Scroll to Last Comment ↓ | Forum Guidelines | Builders' Forum | |
Expedition Wherry - First Build
Hello everyone. Great information in the forum! I'm excited to start my first build in January. I've decided on the Expedition Wherry and this will be a build post updated as I go.
- Intro -
Building a boat has been on my goal list for a while. I'm a handy guy and decent with woodworking. However this will be my first project with fiberglass and large amounts of epoxy.
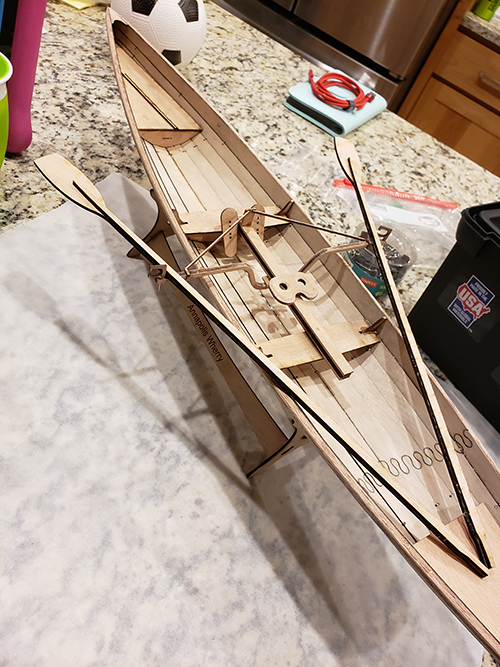
I'm curious for whatever CLC has in store for a runabout because the Glen-L plans were what first gave me the itch to build a boat. I figured I would start with a kit to set me up for success and provide a stepping stone. Step 0 was building an Annapolis Wherry Scale Model. If all goes well I have my eyes on a Kaholo and a Sassafrass along with a teardrop.
I chose the Expedition Wherry because I enjoy indoor rowing and have always wanted to row on a sliding seat on the water. I live in Montana near a few big lakes that I would like to circumnavigate in typical expedition camping fashion. The past 14 months have been an emotional rollercoaster with a lot of big wins and a big losses, both professionally and personally. 2020 was supposed to be my year of taking a deep breath and refocusing life. The universe had different plans with COVID. Going into 2021, I don't see the rollercoaster ending anytime soon. The build and subsequent trips on the water are my way of stepping away, in however small or large increments in time I can manage, to take deep breaths and refocus.
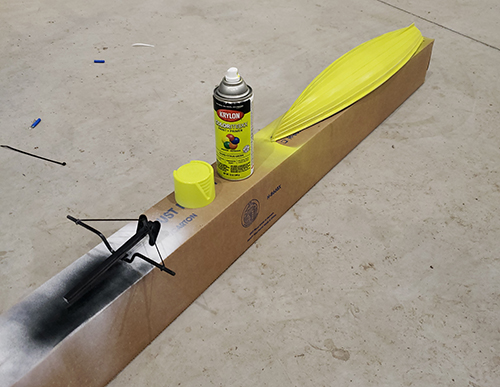
Much like my model, I am planning a yellow hull, brightsides deck, and Seattle Grey for the cockpit and seats.
- Questions -
1. Do I need the Interlux Pre-Kote Primer for the Interlux Brightsides Paint which I will use for the hull? The Brightsides Paint description page says to not prime for emersed areas.
2. Can the Rubstrip kit be painted after it gets installed or does painting it defeat it's purpose? We don't exactly have sandy beaches around here.
3. I like things handy in a boat, such as windbreakers/rainjacket, snacks, water bottles, phone/camera, snacks, safety gear, and some snacks. One image I saw was having a 1/2" hole through the knees in bulkheads 3 & 4. Then I can add rope loops to clip waterproof bags or other items to. Anyone see issues with this? Any other ideas for keeping items handy?
- Pictures -
17 replies:
RE: Expedition Wherry - First Build
Hi Patrick,
I've been thinking about getting into rowing and the Expedition Wherry caught my eye. How is your build coming? Where in Montana are you? I live in Helena. I would love to see the boat sometime.
Best of luck,
Bret
RE: Expedition Wherry - First Build
Patrick,
I totally agree with HSPIRA on the PreKote. I've had much better results with Brightsides without it. When I've applied Brightsides directly on sanded epoxy it has looked great and held up well.
Cheers,
-Dick-
RE: Expedition Wherry - First Build
Hey @bbinmontana I'm in Missoula. I've been doing the boat building at my warehouse in Bonner. If you're ever in the area let me know and we can meet up.
I'm making short clips and photos about the build on TickTok and Instagram. I'm @patrickclay406 on both of those platforms.
The first part of this year has been busy with my company. Part of building a boat as a hobby is that I can leave it sit when I need to focus on other things. But, the overall goal is to be completed by this summer.
-------
The package arrived from CLC in early January and was well packed. One side of the package was opened but nothing was missing as it is all taped to together with, in my experienced assessment, amounts to a solid 6-pack of packing tape.
The second part of the order took a few more weeks to arrive (supplies and such) but I was able to get going earlier.
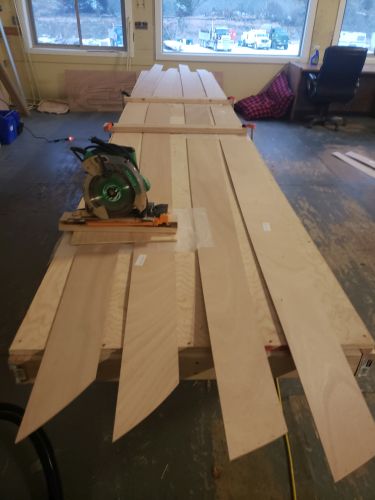
I built a 16'x3' work table at 30" high. I used scraps from this to build an 8'x24" side work table to hold the epoxy mixing station, drill press, and miter saw.
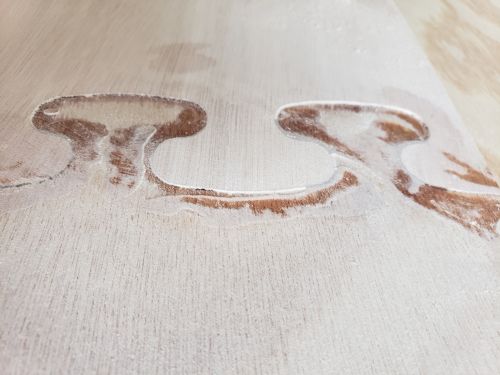
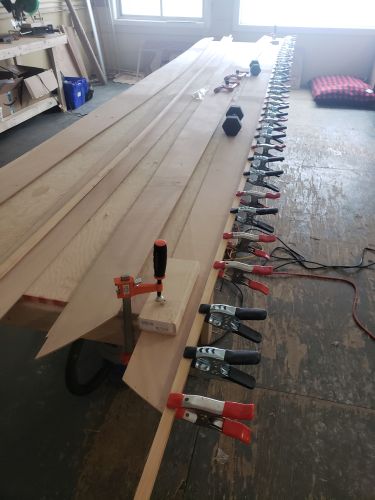
Step one was organizing all the parts. Step two was cleaning up the puzzle joints. This was my first time using epoxy and it went rather well. I would recommend clamping the parts differently as mine ended up with one side being raised about 1/16". I should have clamped just one joint at a time to ensure even pressure across the joint.
I am not too concerned and will smooth these out before painting. If I were varnishing the hull then I'd be more upset. This is my first boat and I'm ok with learning mistakes. The next one will be better - constant improvement.
For smoothing these out, should I sand more agressively or fill it in during or after the fiberglassing?

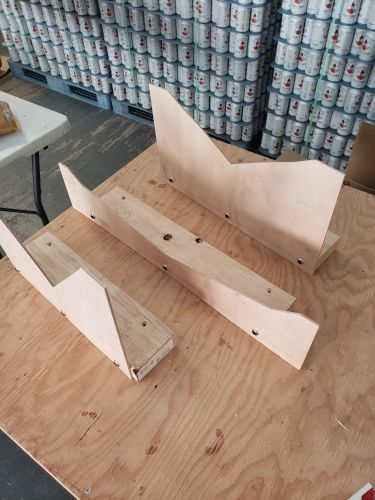
Next I moved on to the bulkheads. I spent quite a bit of time cleaning up the edges and cutting the doublers and cleats. CLC missed two peices of wood for the cleats so they are sending me replacements. I bought 36 clamps between two different styles on Amazon. This product works well.
While I waited for the bulkheads to set, I added 2x4's to the bottom of the cradle. I countersunk screw holes in the 2x4's so I can attach these directly to the work bench.
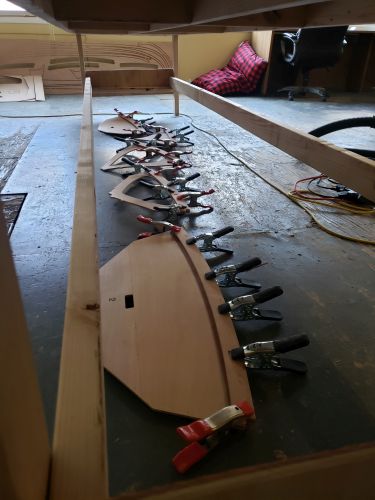
And then I clued up the scarf joints for the sheer. I used more clamps and was more methodic after learning from the puzzle joints. The instructions to this kit mention having a lot of clamps on hand and not being afraid to use them. I concur. I clamped one side of the sheer to the table with a bar clamp then used two spring clamps for each joint.
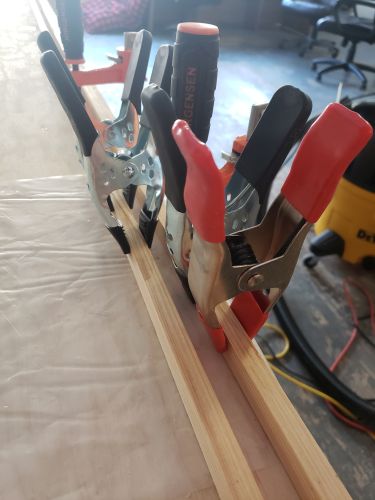
I have clocked about 11.5 hours of boatbuilding time (about 1 audio book and a dozen podcasts so far). I have been taking my time to prep the peices before glueing and to clean up squeeze out. And, a couple more weekends for building the work benches and setting up the space. The space was a vacant area at my company's warehouse. So it took time moving my tools in and getting everything somewhat organized.
This weekend I will be cleaning up the sheer clamps and glueing them to the top of the sheer panels. I think I have enough clamps for one sheer panel at a time. Before my next build I'm going to stock up and have 100 spring clamps on hand. I will probably get to stitching at least the #1 panels tomorrow.
RE: Expedition Wherry - First Build
Patrick,
I am also starting to build an Expidition Wherry which will be my first boat building project. I am lacated in Polson and will be building the wherry in my hanger at Ronan airport.
I received the plans for Christmas and I am at this time enlarging the shop in the hanger for the project.
I have the same desire you do row and camp on some of the lakes in the area. I also want a boat capable of wavy water on Flathead lLake.
I am in Hanger 13 at Ronan and if you see a red pickup parked ther, I am present so stop in.
Ron
RE: Expedition Wherry - First Build
Good luck with your build Patrick. Many years ago I build a Sea Kayak from plywood and cedar strips. A very sea worthy craft. I ordered a model of the Annapolis Wherry today. Going to build before the real thing. Which I hope will be fairly soon. I row indoors also on a WaterRower and would like to try on water.
Awesome procress report.
RE: Expedition Wherry - First Build
@RonEdward, I'm up towards Kalispell often. If I ever see your red pickup while I drive through Ronan, I'll stop in.
@maustin, I use a Concept rower and it’s a great workout. The wherry model kit was a lot of fun. Have you started working on yours?
--------------
I have a few questions at the bottom of this post for those with more experience.
I've made good progress over the past few weeks but as spring shows it's cards, I'm motivated to move faster. I work on the boat every other weekend or so for a few hours plus a few evening hours each week.
So far I have 28.5 hours into the project. I recommend The Rise and Fall of the Dinosaurs on Audible. It is a good story with nice narration.
------------
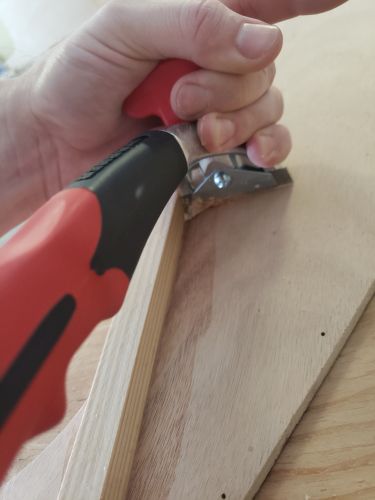
I glued up the sheer clamps and relieved the inside edge. The plane and hand sanding was the best way to do this I found.
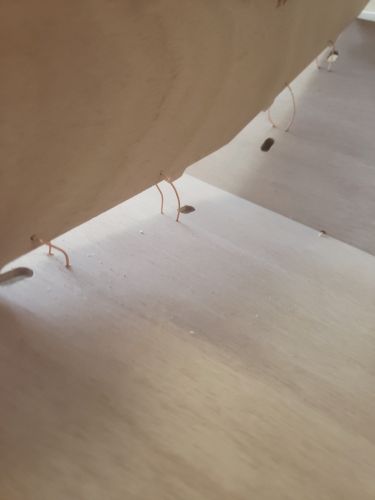
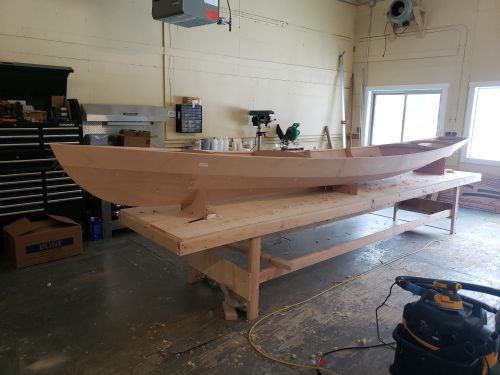
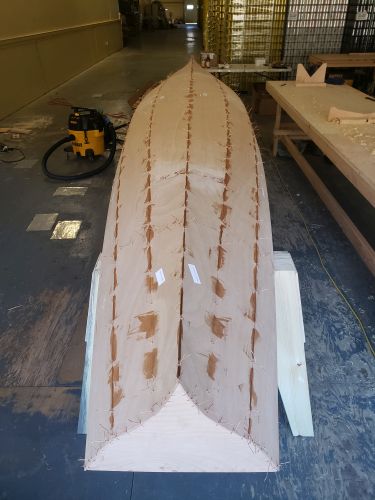
Piecing the panels together was accomplished over a few weekday evenings. I broke many wires trying to get the panels to align. The bulkheads were not sitting flush with the panels in the beginning either. I was a little frustrated with tightening wires only to have them break. I didn’t understand the instructions until after completing the full tightening phase (pg 47). Hand tight means loosely tight just so it holds together, not “as tight as you can get it with two fingers.” Once all the panels were on and I went through tightening the wires, everything slipped into place without many more broken wires.
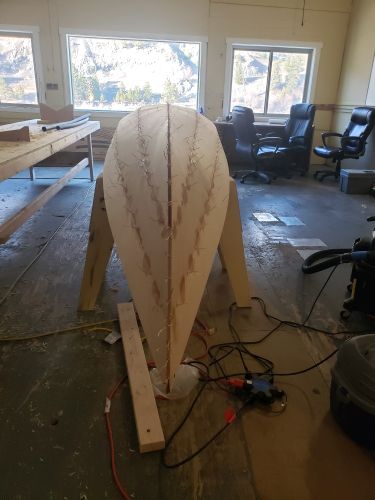
When I flipped the hull onto saw horses, I noticed the cradles scratched the plywood on the bottom of the boat. I will be painting the bottom so I’m not overly concerned, but I have since purchased pipe insulation to line the cradles to prevent further scratching. For those who are building and plan to varnish the exterior of the hull, pipe insulation lining the cradles would be a good precaution.
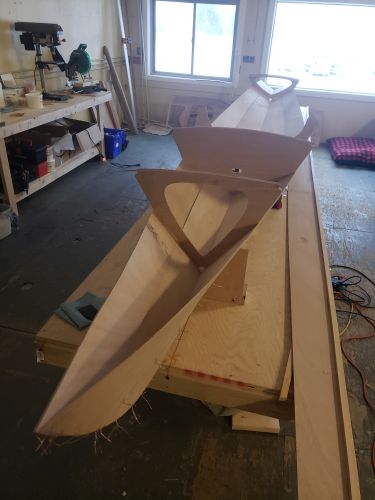
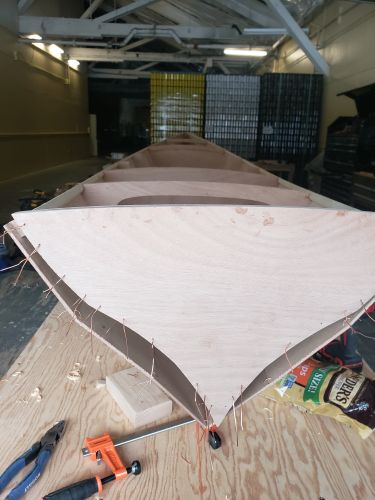
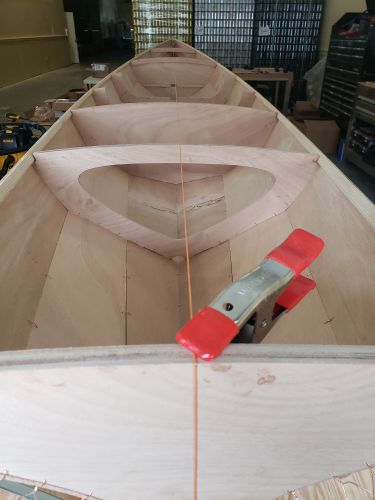
I trimmed the sheer clamps at the bow and used a screw to hold the bow together. The technique of measuring with a string from the centerline of the transom to the outer edges of the bow worked well.
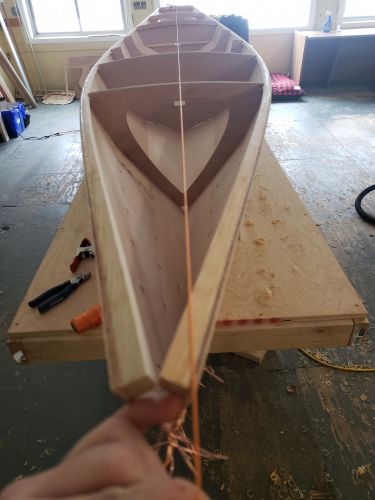
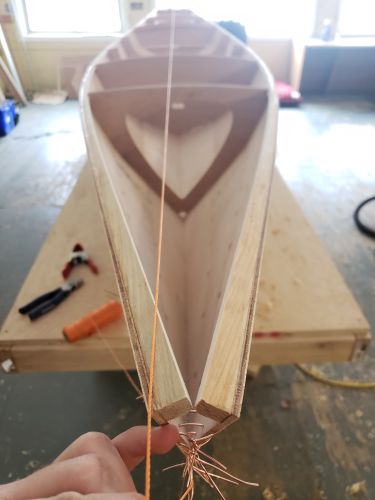
Then it was all tightened up and ready for epoxy tack welding.
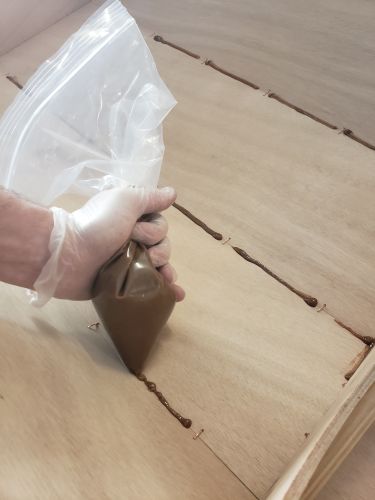
I waiting to tack weld until I had a good chunk of time. This took about 4 hours total over a Saturday afternoon. I used a zip lock bag instead of pastry bags (poor planning on my part). The seam of the bag broke half way through and created an epoxy mess. I had to quickly find a makeshift bag as a replacement. It was too thin of plastic and as the epoxy heated up the hole in the bag expanded. When I do the fillets, I will have real pastry bags.
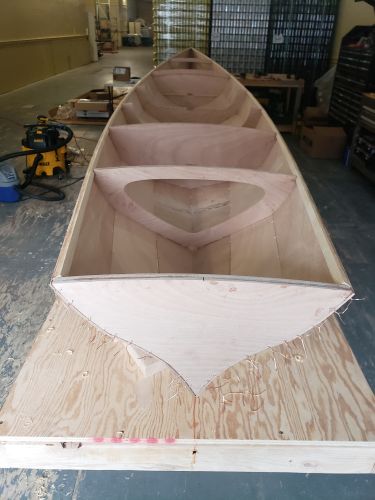
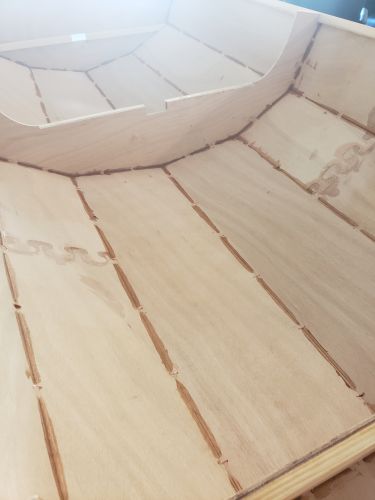
I started at the center of the boat and worked my way out doing one section at a time. I kept things clean with a plastic putty knife. For smoothing out the tack welds, I used a variety of 3 sizes of popsicle sticks. Michael’s had a sale on mini, regular, and jumbo sticks. I think the jumbo sticks will be large enough for the fillets as they have a 1” radius.
Messy blow out. I thought I was done with these since my kiddo is potty trained.
Next up I will cut the wires out, clean up the interior with sandpaper, and cut the pieces of fiberglass for each hull section, and then fiberglass the interior. I can do the first two parts during the evenings. But, I’m waiting to do the fiberglassing until I have a lot of time. A full two day weekend to devote to it would be nice. It will be my first time laying cloth. I think I will start with the hull sections which will be decked.
My main concern is the time between coats of epoxy. From what I’ve read, if I apply the second coat while the first coat is still tacky, then I shouldn’t need to sand between coats. Does this mean I could lay the cloth and do the first coat in the morning, then come back about 4-6 hours later to apply the second coat of epoxy?
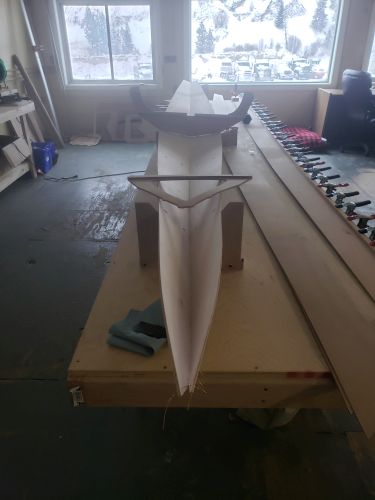
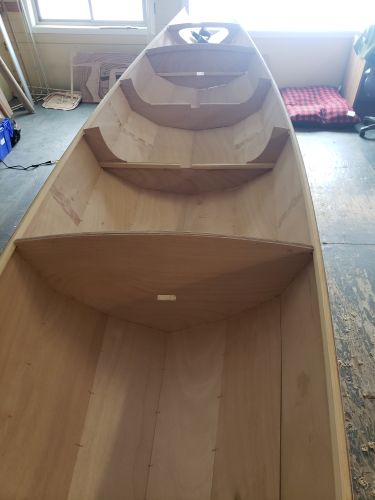
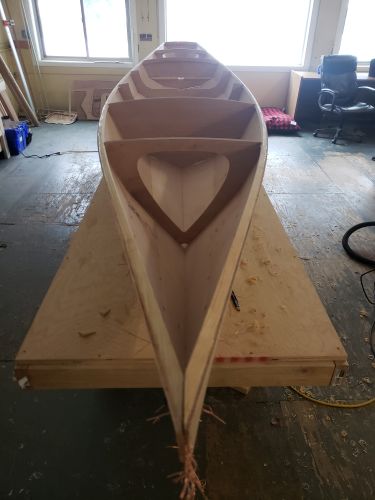
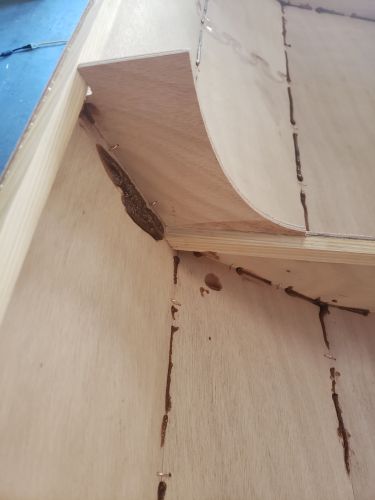
Some of the bulkheads are not straight, they have a bit of a bow in them. I think this will correct itself when I install the deakbeams. Is there any concern here? Are there any steps to take before fiberglassing to ensure these straighten out?
Here is a picture of the seat deck laid in the boat and how the bulkhead is bowed away from the straightline of the seat.
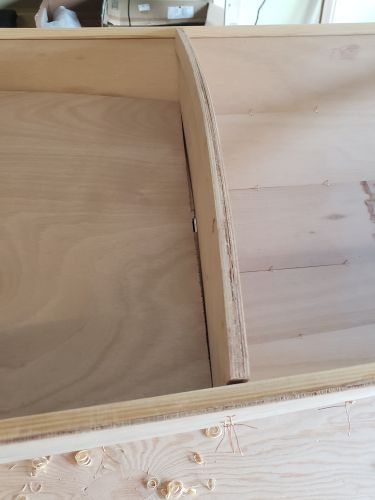
I’m up to page 54 in the instruction book for those following along at home.
RE: Expedition Wherry - First Build
Looking good! Thanks for the posts. It's interesting to see how this actually works.
I hope to catch up with you sometime.
RE: Expedition Wherry - First Build
Thanks for the great pictures! I learned a few things that will help me in my build.
RE: Expedition Wherry - First Build
Hi Patrick. Bret from Helena here.
How is the boat coming? I hope you are out rowing.
Would it be feasible to see the boat sometime?
Thanks
Bret
RE: Expedition Wherry - First Build
Still at it Bret. I'm at the stage of installing the skeg. Life and work caught up with me! I'll be able to devote more time to it this spring with hopes of having it finished by summer. You're more than welcome to stop by any time.
RE: Expedition Wherry - First Build
I'm going to chime in here, risking personal building opinions in a public forum and therefore open to all sorts of differing views. I'm commenting especially because we're running a concurrent discussion of CA "tack welds" right now. And I realize it is too late for you, Patrick - until your next build.
You yourself say that you logged 4 hours doing tack welds, and ended up with some inadvertent messes.
First - I think you used MUCH too much glue for your tacking. The things you laid down were nearly the size of filets. In my opinion the only purpose of the tacks is to hold the boat in shape so that the wires can be removed without anything shifting. This requires only a very small (pea sized) spot of glue between wire stitches, and in many locations -stress and gap size (if any) dependent- a tack isn't needed be between every stitch. Then just a quick swipe with a finger or tool to make sure the dab of epoxy will be below final filet thickness. Obtuse angles might require more swiping down into the joint, acute angles often require no smoothing.
Second - You wiped a lot of your tack material out onto your planks. With that epoxy being "colored" by wood flour and/or cellofil, all that would have/will be needed to be sanded away prior to finishing if you were planning for a varnish finish. (I know you say you are painting, so this comment is for the benefit of others.) I've found this truism, based on some growing experience: "The more epoxy you put on the boat, the more you have to sand off." Sanding is a large percentage of the time and effort that goes into stitch-and-glue building. I've noted elsewhere in the forum that "experienced" builders say that in their early builds they always ran out of epoxy before the boat was done, and in later builds had epoxy left over. That is true for me, too.
Third - All of this advice is "overcome by events" if you shift to using CA glue. I'll guarantee you'd have been done tack welding in 40 minutes or less (not 4 hours) with no prep, no messes, and no clean up and no subsequent sanding if you'd used CA glue for the welds. And you would have created a higher probability of easily creating nice smooth filets when the time came to do those.
Enjoy your build, and your next one ;)
RE: Expedition Wherry - First Build
Thank you so much for your feedback Bubblehead! I agree I used way too much epoxy for the tacks. I used CA glue for my Annapolis Wherry model and think it would be great on a full size boat.
I'm in the same boat of running out of epoxy. It will be interesting to note what the final weight of this boat is. I'm glad I'm getting the practice out of the way before doing an oxford shell.
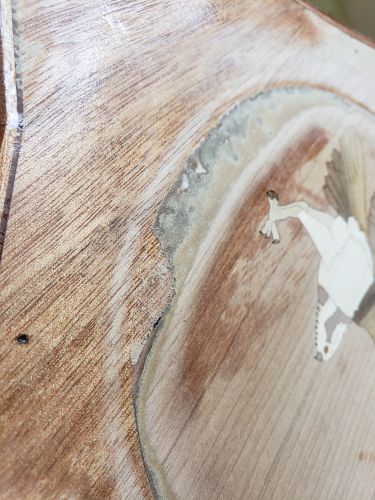
So, next question. Did I mess up my overlay? I glued it on and then sanded down the edges. I feel like I made a mess of it and the color differences will only be highlighted when it has fiberglass on. Thoughts? Should I just sand it off and paint the transom?
RE: Expedition Wherry - First Build
I've done several onlays, and recently one inlay, using those provided by CLC and similar - the very thin veneer wood styles. All turned out well. The onlays do create a slighlty raised area, but that is well smoothed over and faired in by the glass and epoxy overcoating and not very noticeable.
Sorry to say, but yes, yours looks pretty messed up. The items I received from CLC came with a sheet of paper with pretty good directions and warnings describing the installation process - one side ot the page for inlay, and one for onlay.
So, I'd recommend either do as you describe in your post with removal and painting, or, you could sand down and try again using a new onlay in the same location. If the same size won't cover the damaged area well enouth you might try something bigger, or maybe paint a 1/4 inch wide "picture frame" around the new onlay prior to covering with glass/epoxy.
RE: Expedition Wherry - First Build
Hi Patrick, I'm glad to hear you are still working on the boat. I am still very interested in seeing it but am only occasionally in Missoula from Helena. It seems rather awkward to coordinate through this fourm. Would email work for you?
Thanks, Bret
RE: Expedition Wherry - First Build
PS
I do not have any social media which is why I suggested email.
Thanks
Bret
RE: Expedition Wherry - First Build
Sounds like there is a lot going on right now. When it is convenient for you, please contact me. email, phone or text
bsbrunner99 AT gmail DOT com
Four O Six Two O Two Zero O Nine One
Bret


RE: Expedition Wherry - First Build
» Submitted by hspira - Fri, 11/27/20 » 10:30 AM
thanks for sharing your project. nice work on the model. you look like you will handle the full build competently and beautifully. the forum is a great place for advice...and you will receive a lot of help ideas, sometimes with different recommendations, but all built on a community of experience and well meaning.
on your questions:
1 - pre-kote primer. in my view, not needed. i have built both with and without. the prekote primer has typically made for a more fragile paint job when i used it...much more susceptable to being scuffed off. when i did use it, way back when, it did save labor on sanding and getting a smooth surface to paint. but i focused on improving my sanding skills/tools and don't use it anymore and directly applied to the epxoy/glass, the Brightsides is amazingly durable.
2) i generally do not paint the rubstrip becuase the paint will get rubbed off on the bottom of the rubstrip exposing whatever color is behind it. most rubsrip installations get done with epoxy that has graphite mixed in to give it a black color...so when it gets scratched, it looks black. so if the rubstrip itself is done in black, then it stays black and does not change the look when it gets scratched. the only exception i have to my painting rule is i have painted my rubstrips flat black in the past to make a clean line where they join the paint job...see picture below. in this technique i took some fairing compound and blended the rubstrip into the hull so it loos intergrated vs looking like a strip on top of the hull. the paint helped me define a clean/good looking line.
3 sounds like a great idea. i see no negative impact. if you were looking for alternatives, you could put eyestraps on the underside of the seats...and you would not see them from most vantage points. i don't think the hole would necessarily look bad.....and i think its important to have conveneint tie downs. my personal aesthetic is less busy (holes, brackets, fittings, etc) that you see the better. see the conversations in https://www.clcboats.com/forum/clcforum/thread/49954.html for more thoughts. this thread seems pretty related to your question.
h