Builders' Forum |
|
| ↓ Scroll to Last Comment ↓ | Forum Guidelines | Builders' Forum | |
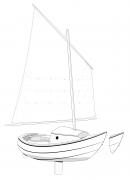
I finished my Petrel Play S&G: Sept 3 - March 31 though I didn't record the number of hours. It came in at just under 40 lb. Here are my notes from the build guide that might help future builders. This is a few pages long and references the page number and the figure text.
Petrel Play S&G Build Notes
First, check all the parts against the parts list on p6. I cut up a couple of PostIt notes to make sticky tabs that I could use to mark various places in the manual, like the Parts page, Hull, Deck, and Skeg assembly sections. As I accomplished a step, I put a checkmark on that item so that it was easy to find what I needed to do next. Sticky tabs were moved forward as I progressed.
The manual is primarily created from the Petrel S&G assembly. There are a few changes for the Petrel Play S&G construction. Some steps don’t apply to the PP.
Read the entire manual before you start. It is a good idea to read ahead from time to time to refresh your memory on what’s coming up.
P19: The instructions say that the wires should be cut about 3” long. The photo shows three cuts. But the circumference of the roll is 12”, which would result in 4” pieces. I found that cutting 3” wires are fine. I had no problems inserting them or tightening. I even had a roll of wire left over (for a potential future build?).
P24: Assemble the Side Panels – the PP sides are two parts, not four.
Adding the Stern Side – Add bow tips to the hull mid-panels.
P25: Wire the Bow – 3 wires on the PP.
P26: Assemble Side Panels – Mid hull panel tip – there are no tips on the PP left and right sides. Instead wire hull mid-panels to hull side panels.
Puzzle joints may need some light sanding along their edges in order to get them to fit snuggly with no gaps. Sand a little and test the joint. Don’t over-sand. See P74: YES!
P38: Keep the Hull Wired to the Forms - I assembled both deck and hull forms before spot welding/gluing the hull seams so that I could make adjustments as needed. I stretched a thin cord from bow to stern and checked that the hull was straight. I laid two straight .75” sticks across the hull form about 3 ft from the bow and stern to check that the hull was not twisted. This is shown in one of the videos on the CLC web site but isn’t in the manual. I dry-fit the deck to the hull to make sure they were in alignment and that I wouldn’t have problems pulling them together once they were glued. I should have spent more time on this as it still took a good amount of effort to mate the completed deck to hull.
P48: Make Some Epoxy – Don’t try to do the fill all in one pour – it will overheat, especially in warmer environments.
P66: Start Assembling – Packing tape didn’t work for me. I found it best to use heat and steam to get the parts shaped, particularly the small forward hatch. A wet towel and an inexpensive iron worked well.
P68: Flatten the Recess – Tacked the recess to the ring with CA while the assembly was clamped down to a flat surface.
P76: Install Forms – Form #2 doesn’t have a wiring location. You may want to add some holes and wires to hold it in position.
P88: Spot Weld all the Seams – This is a good time to stop and check the fit with the hull so you can make adjustments now before doing fillets. I found that some areas needed to be bowed out and others pulled in. A half inch gap of the epoxied parts is going to take some effort to pull together if you don’t address it now. I think my build is wider and flatter than the intended design, potentially resulting in less vertical space for my feet.
P99: Glue in the Plate – Make sure that both plates are parallel with each other and the same angle with respect to the deck before tacking them in place.
P100: Reinforce the Control Box – I installed the longer tube facing aft.
P108: Tape the Ends – Gluing and taping both ends is important to do first so that you don’t wind up with a warped boat. There may be some overlap since the deck still needs to be pulled down to the hull.
P109: Fasten Deck with Fiber Tape – I found that several ratchet straps worked better for me to start than fiber tape.
P114: Tape Ready to Apply to the Seam – I did the seam in four steps, half of each side at a time, using epoxy slightly thickened with wood flour to make it less runny.
P116: Reaching to the Ends – I used gloved fingers to smooth the tape, much like using a squeegee, to press the tape into the bead of thickened epoxy in the seam. I started unrolling the tape from the ends and worked back towards the cockpit.
P116: Peel the Outside Tape – At this point I added to the epoxy fill in each end by standing the boat up on end and pouring some slightly thickened epoxy into the end.
P118: Forming the Scuppers – I used the tip from MarkN in which he used a piece of tubing to make drains. Heavily wax the tubes first so they can be pulled out when the epoxy has cured.
P134: Footbrace Mounting Holes – I used Weld Mount studs epoxied to the inside hull – no external screws.
P136: Spot Weld – There was too much gap to use CA. Tape one side, apply the fillet to the other side and allow to cure. Finish by removing the tape and applying the fillet to the other side. I also didn’t mask the area before doing the fillet, just being careful about applying the thickened epoxy.
P136: The Front Bulkhead – I have long legs and even still this bulkhead didn’t fit very well. I created a cardboard template and added scraps to the edge of the bulkhead to get a good fit. The thickened epoxy fillet provides the necessary support. A spoon screwed to a stick is needed to smooth the fillet.
P140: Sanding Position – A Diablo foam sanding block with Velcro mesh abrasive sheets worked extremely well for hand sanding things like the chines.
P142: Horizontal Tipping – I was more successful in keeping a wet edge by alternating sides for each section instead of trying to do two 12” sections on each side. One quart of Schooner is enough for four coats of varnish and will leave about ¼ of the can left over.
P143: Clean off Varnish – I installed the hatch rings before varnishing.
P144: Back Band Mounting – I installed the Creature Comfort seat. It’s a tight fit between the cheek panels. I removed the elastic on the seat back so it will lay flat when the cover is in place.
P146: Minicell Foam (bottom picture) – The kit doesn’t include foam, so you’re on your own to decide what needs padding.
P147: Deck Line Mounting Holes – The manual isn’t very helpful with suggestions here. I looked at examples of other boats on the CLC web site and the “Builders Tips” web page contains instructions on making bungee cord fittings. I located three fittings 9-1/2” apart and 1” above the sheer line on each side forward of the cockpit and one each side aft of the cockpit. Use the drill-fill-drill method.
P149: The skeg is highly recommended for good directional stability.
P167: Cover the Flat Faces – This should also trap the skeg pivot pin within the box.
P169: Cut the Slot – This step is easier to do before glassing the hull exterior. This also allows for the fiberglass to be cut and formed down into the skeg box. You’ll add another layer of glass later.
P170: Alignment Jig – The jig isn’t for the Petrel Play so you’ll need to adjust its fit. There are two forms – one for the forward end and one for the aft end of the skeg box. I stretched a thin cord from bow to stern to use as a visual reference when checking alignment.
P177: Lay Down Two Layers of Glass – I used one layer since I also had the fiberglass cloth from covering the hull.
P183: The Cable Hole – I used a 9/64” hole for the 1/8” cable.
P183: Clamp Hole – The supplied setscrew is 10-32, not a 10-24 as printed.
P189: Set Screw Hole – I had to grind the setscrew to reduce its diameter to fit into the hole and grab the cable.
END
No replies have been added to this post.