
Builders' Forum |
|
| ↓ Scroll to Last Comment ↓ | Forum Guidelines | Builders' Forum | |
Sheer clamp radius at rear of Shearwater 17 Hybrid
Hello,
I am building a Shearwater 17 Hybrid and am at the point of gluing the sheer clamp to the side panel. I assembled the two pieces with clamps and without epoxy to see how it would assemble. I found it very hard to get the sheer clamp to follow the radius of the side panel at the rear as the rear most point kicks up pretty quickly. I can come close but not get it exact. I am thinking I will need to steam the last 2-3 feet of the sheer clamp and then put it around a form I will make to make it easier to glue, but thought I'd ask before I build the steaming box. I had no issue with getting the sheer clamp to follow the side panel at the front of the kayak as the transition to the forward point is a larger radius than at the rear.
Thanks in advance for your feedback.
7 replies:
RE: Sheer clamp radius at rear of Shearwater 17 Hybrid
Thanks h,
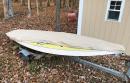
Your message is helpful. Below is a picture of my condition.
From what I read in the manual, I should have the sheer clamp even with the plywood in the end areas of the kayak. I understand your suggestion to plane it back. As I think about that, since the sheer clamp is 3/4 inch tall, what if I used a band saw to remove a 1/8 - 1/4 on the bottom side for the last 2 to 3 feet to make it flex easier in this area. Then I think it would align nicely.
I have a question on your router suggestion, which I like. I do have a nice little palm router that would work well for this. I think I read in the manual or on the website that the sheer clamps will be used to mount hardware to, I assume for bungies. A radius would slightly reduce the area for the mounting. Should I be concerned about this? When you said 1/2 round, did you mean use a half inch radius round over bit or does that mean a bit that will round the top and bottom edge at the same time? If the latter, I don't have one of those but I can create the same by making a pass top and bottom.
Paul

RE: Sheer clamp radius at rear of Shearwater 17 Hybrid
thanks for the picture.
there are three ways i think you can make it work. 1) is to simply leave it as is. at the ends you don't really need the shearclamp to be proud of the side and you can just trowel in some woodflour-thickened epoxy at the ends to fill the gap when attaching the deck to the hull, 2) you can, at the place where you have the two clamps, just let the sheer clamp float up ~3/16 inch and i bet when you do that the end will then be slightly above the side and then you can plane it down, or 3) at the point of maximum bend right now, just make several saw cuts in that area on the top of the shearclamp to about half way through the shearclamp, and i think it will then allow the wood to flex to make that bend that you need. also, you should check your plans to confirm that the shear clamp is actually supposed to go all the way to the end. in a lot of boats with shear clamps, they stop the clamp about 4 inches or so from the ends as you wont be able to stitch the ends together if the shear clamp is there without cutting it back.
on the router, the picture below i hope clarifies this. i am not great at the proper terms...so apologies if i muck it up. i just use a round over bit (half round) of a diameter like 1/2 inch or so to smooth over the inside edge of the sheerclamp. i hope my picture gets the ideas across. it's not so much material that it will impact rigging. it is just nice not to have sharp edges inside the boat. with a handheld router, its easy to do this operation right after glueing the sheerclamp to the sides of the hull.

RE: Sheer clamp radius at rear of Shearwater 17 Hybrid
Paul I mostly agree with h's solutions to youir original question, but I'll add some comments I hope may be helpful.
Using a piloted router bit on sheer clamps once installed may prove difficult in that clearance is needed for the ball-bearing pilot on those bits, and the small cap screw that secures the bearing to the bit's shaft. Vasty easier and safer to do any edge-rounding before you marry the clamps to their panels.
If those clamps are furnished 1/2' wide (side to receive epoxy to bond deck) by 3/4" high (side againts which the appropriate panel will be bonded) a 'round-over bit' cutting a radius of 1/2" will leave no material upon which the pilot bearing can bear during use. 3/8" radius would be the most I'd try to use, or even 1/4" radius, enough to render the factory square edge more 'user-friendly'.
Looking at your image (congrats on getting it to shoe up!) I don't think that little bit of projection matters a bit. Again if the sheer clamp is 1/2" x 3/4" that doesn't look like much more than maybe 3/16's is 'proud' of the sheer plank's top edge, much of which may get planed off when you go to create the bonding surface on the clamps to better match the angle at which the deck will marry to the sheer planks. As h noted often clamps end before this point anyway so even 1/2" of bonded area againts the sheer plank's inner surface ought to be plenty for these parts.
RE: Sheer clamp radius at rear of Shearwater 17 Hybrid
Thanks to both of you for all the input.
I did a combination of things today. Since I don't have much experience with the block plane, I wasn't sure I wanted to plane on the top, but I got some experience with it today as I scrapped the band saw idea and used the block plane to take 1/8 inch off the bottom of the sheer clamp for 24 inches from the end and then added a taper for the next 6 inches. The sheer clamp bends reasonably now. The picture below is after doing this. I think it follows the curvature of the side panel very nicely. My plans do call for the sheer clamp going all the way to the ends. Per the plans, I will need to put an angle on both sheer clamps so that the two mate at the point.
I also put a 1/4 inch radius on the inside bottom edge of the sheer clamp. I needed to do it before attaching it to the side panel as the router would hit the side panel if I approached it from the bottom and the bit sticks more than 1/2 inch below the router plate if I tried to do it from the inside.
I am reading this forum daily now as I find it a great place to learn in general and get specific help as needed.
Thanks again!

RE: Sheer clamp radius at rear of Shearwater 17 Hybrid
Yep, you've done a masterful job of figuring out how to get past a speed bump! Gaining confidence with overcoming each challenge feels good eh?


RE: Sheer clamp radius at rear of Shearwater 17 Hybrid
» Submitted by hspira - Sun, 3/14/21 » 10:46 AM
Hi Hybrid builder,
yes, the ends will get a bit tight. learning to use the picture feature of the site would be great to show us what "close, but not exact" actually looks like.
that said, i think you can avoid the steam box and actually just go with "close, but not exact". the reason for the shear clamp on this design is to provide a glueing surface for the deck to the sides of the hull. the angle between the deck and sides of the boat was considered to sharp to support simply taping the inside of the hull/deck seam with glass.
the point i am trying to make is that the shearclamp is not 'structural' ...especially towards the ends. if this was a very sophiticated manufacture, the shear clamps would get smaller in the ends to support the glueing (and easier to bend). so what i tend to do in this situation is push the shearclamp up on the hull at the ends so i get coverage for the sharp bend...and then i am going to plane it back to its final shape. as long as i have some of the clamp on the side and enough above the side to allow the deck to settle on it, i would just go with that.
fwiw, the other thing i do when i do shearclamps is take a 1/2 round router bit and ensure that the inside pointing edge of the shearclamp has a nice radius to it. its not called for in the construction manual but is a nice feature, cuts a bit of weight and is easy to do if you happen to have a router.
i hope this helped.
h