Shop Tips » Fitting Out Your Boat |
How to Install a Drop-In Rowing Unit in a Chester Yawl

|
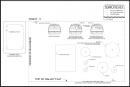
Step 1: Aligning the Rowing Unit - Make sure the Yawl's floorboards are properly seated, set the row wing in the boat, and center it from side to side. (The footbraces point aft, of course.) We'll align the unit relative to the center set of oarlocks. The outrigger sits just aft of the oarlock sockets. Use the bolts to center the rail clamp's holes over the oarlock sockets. |
 |
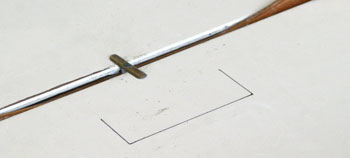
| Step 2: Marking Leg Positions - With the row wing in position, trace around the leveling legs onto the floorboards. |
|
|
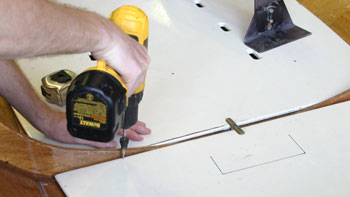
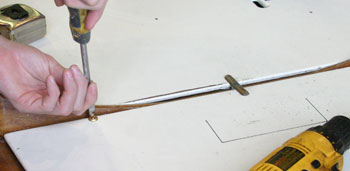
Step 3: Stabilizing the Floorboards - For sliding seat rowing, the forward and aft floorboards must be fixed in place semi-permanently. (The center floorboard is still removeable for bailing.) The floorboards are screwed to the floor ledges. The forward floorboard needs four screws; the aft floorboard only three. Here we are pre-drilling the holes with a countersink bit. Use the 8 x 1-1/4" silicon bronze wood screws and finish washers from your hardware kit. |
|
 |
|
 |
|
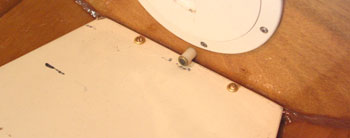
| Step 4: Installing the Blocks - The wood blocks included in your kit will stradle the bases of the leveling legs, as shown. Pre-drill with a countersink bit and screw the blocks to the floorboards. The leveling legs will slide under the blocks for easy installation and removal while transporting the boat. |  |
|
Step 5: Securing the Rowing Unit - Before moving the unit into position, put the bolts and washers through the clamps on either side. Turn the clamps so that the bolts are horizontal. Now you can slide the row wing into place, turning the clamps down as you go so that the bolts feed into the oarlock sockets. Retighten the clamps, pop a washer and a locknut onto the other end of each bolt and you're all set. To remove the rig, simply reverse the process. |
 |