Shop Tips » Strip Planking |
Hybrid Decks - How to Build a Kayak With a Cedar Strip Deck

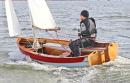
 How It Works - To make a “hybrid” kayak, that is a kayak with a plywood hull and a cedar strip deck, you need to start with temporary molds installed in the hull. The strips are assembled on the deck in an eye-pleasing pattern, held together with ordinary yellow wood glue. The assembled deck is lifted off the hull, sanded, and its underside sheathed with fiberglass. The temporary molds are removed, and the deck is glued back onto the hull. Finally, the top of the deck is ‘glassed, the cockpit opening trimmed, and the cockpit coaming installed. The watertight bulkheads aren’t altered and perform the same function.
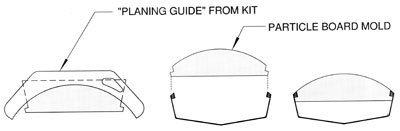
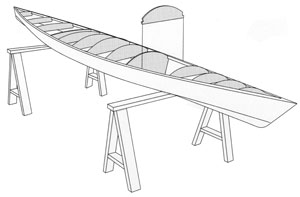 Step 1: The Molds - All of our kayaks have radiused decks, and the kits include templates for planning the sheer clamps to accept the radiused decks. Use the curvature in the template to establish the radius for the tops of the mold. The taller radius is for the front half of the boat, the lower for the rear half. Molds are placed on about 12-inch centers. Watertight bulkheads should be incorporated at the front and back of the cockpit. You must protect the tops of the molds and the sheer clamps with plastic and packing tape, so the deck won’t stick.
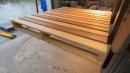
Step 2: Start Strippin’ - There are infinite possibilities for strip deck designs. We’ve seen mosaics, wild curves, and parquet effects. All it takes is a rough sketch of what you want to do, and a sharp Japanese saw to cut and fit the individual strips. Glue the strips together with wood glue like Titebond III, which cures fast. You can use ordinary staples to hold the strips on the molds while the glue cures:
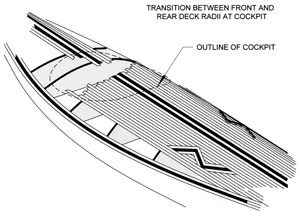
Step 3: Deal with the cockpit - In the cockpit area, the higher deck radius will transition to the lower aft deck. Terminate the front and rear strips in the cockpit as shown here, with the outer strips running continuously past the cockpit. Later, you can trim the cockpit opening and laminate the plywood cockpit coaming in place. Shearwater builders have a “cockpit apron,” a plywood platform for the cockpit coaming.
Step 4: Lift the deck off - Pull out all of the staples and carefully pry the deck off of the molds. It’ll hold its shape, and you’ll find it surprisingly strong. Set the deck aside and knock the molds out of the hull.
Step 5: Deck Preparation - With the deck resting in cradles, sand the underside completely smooth. Sheath the underside with 4-ounce fiberglass fabric set in epoxy.
Step 6: Gluing on the deck - Unlike plywood decks, a strip deck will already be fully formed to shape, and thus attaching to the hull is easy. Slather thickened epoxy on top of the sheer clamps and bulkheads, and hold the deck down with duct tape and tie-down straps.
Step 7: Fiberglassing - When the epoxy has cured, trim any overhanging deck and neatly round the joint between hull and deck. Sheath the deck in 4-ounce fiberglass, overlapping the hull sides by two inches or so. You’re done except for installing the cockpit and cutting hatch openings.
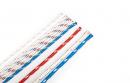
Chesapeake Light Craft carries Alaskan Yellow Cedar strips and Western Red Cedar strips. Let us know if you want to convert one of our standard kits to a hybrid deck.