Gluing Up Puzzle Joints
Stitch and Glue Boatbuilding TipsChesapeake Light Craft’s precision CNC cutter creates “puzzle joints” to add necessary length to plywood panels. These joints must be glued up prior to assembling your project.
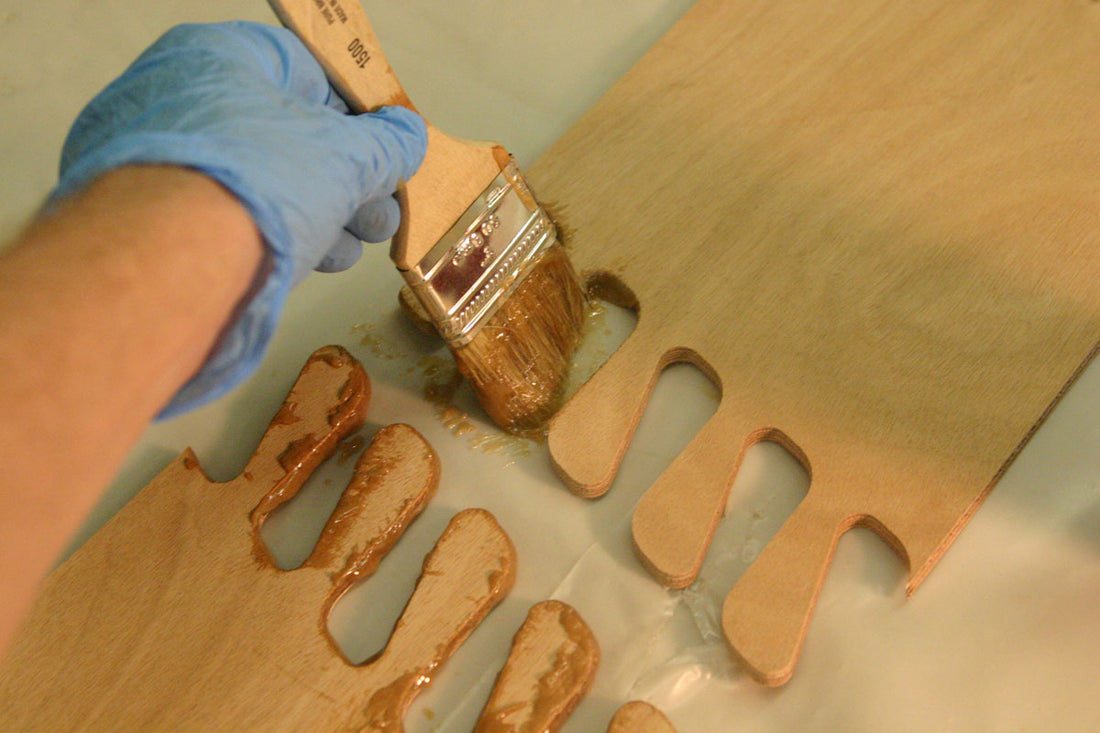
On a flat surface protected with polyethylene plastic, spread out the panels. The joints are epoxied together using a mixture of epoxy and silica powder such as Cab-O-Sil or a strong cellulosic fuller such as Cell-o-Fill. The ideal thickness of such a mix is a “mustard” consistency. It doesn’t drip off a stick, but it spreads easily and smoothly.
Brush a generous amount of this epoxy mixture onto both sides of the joint.

The puzzle joints will need to be clamped to guarantee alignment as they cure.
You must be very careful that your clamping surfaces---including the floor or bench---are protected from the epoxy with plastic. You don’t want them glued to the panels!
Blocks of scrap wood, protected from the epoxy with plastic and screwed down to a table top over each puzzle joint, provide the best chance of clean alignment and strong joints. on narrow panels where the scrap wood can span the joint without bowing to maintain an even pressure across the joint.

Don’t have a wooden surface for screwing down clamping pads? Working on a panel wider than a few inches? You can use heavy weights, like buckets of sand, cinderblocks, or some free weights, spread across a board over the joint to distribute the weight evenly. It always takes more weight that you think. Just be sure to protect the floor or bench and whatever you use to clamp the joint with plastic.

The epoxy will need to cure for at least 24 hours at room temperature, defined as 60 to 90 degrees F (16-32C). All of the puzzle joints will need to be gently sanded on both sides. We use a combination of a 5-inch random orbital sander with 120-grit paper, and cabinet scrapers as shown here.

Download a printer-friendly PDF of this Shop Tip here.


