Boatbuilding Tips
Our vast collection of boatbuilding tips, drawn from decades of experience in supporting backyard boatbuilders.

![Strip Planking 35: Laminating the Coaming Lip [video]](http://clcboats.com/cdn/shop/articles/tip-35.jpg?v=1729125153&width=533)
Strip Planking 35: Laminating the Coaming Lip [...
Nick Schade writes: I make the lip of my coaming (the part that holds on the spray skirt) by laminating a stack of thin laminations around the coaming riser (the...
Strip Planking 35: Laminating the Coaming Lip [...
Nick Schade writes: I make the lip of my coaming (the part that holds on the spray skirt) by laminating a stack of thin laminations around the coaming riser (the...

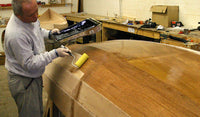
Strip Planking 34: Applying a Fill Coat [video]
Nick Schade writes: A "Fill-Coat" is what I call the coat of epoxy applied after fiberglassing which is intended to fill in the weave texture of the fiberglass so that...
Strip Planking 34: Applying a Fill Coat [video]
Nick Schade writes: A "Fill-Coat" is what I call the coat of epoxy applied after fiberglassing which is intended to fill in the weave texture of the fiberglass so that...
![Strip Planking 33: Installing a Solid Outer Stem [video]](http://clcboats.com/cdn/shop/articles/tip-33.jpg?v=1729123997&width=533)
Strip Planking 33: Installing a Solid Outer Ste...
Nick Schade writes: There are a couple ways to add an external stem to a kayak. While I typically use thin laminations stacked and bent and glued in place, on...
Strip Planking 33: Installing a Solid Outer Ste...
Nick Schade writes: There are a couple ways to add an external stem to a kayak. While I typically use thin laminations stacked and bent and glued in place, on...
![Strip Planking 32: Joining the Deck and Hull and Taping the Inside Seam [video]](http://clcboats.com/cdn/shop/articles/tip-32.jpg?v=1729123758&width=533)
Strip Planking 32: Joining the Deck and Hull an...
Nick Schade writes: Joining the Deck and Hull One of the more frequent questions I get is; "How do you put the deck back on the hull? How do you...
Strip Planking 32: Joining the Deck and Hull an...
Nick Schade writes: Joining the Deck and Hull One of the more frequent questions I get is; "How do you put the deck back on the hull? How do you...
![Strip Planking 31: Smoothing the Hull Interior [video]](http://clcboats.com/cdn/shop/articles/tip-31_bc907da2-f971-4312-b1c0-f2a7335ee978.jpg?v=1753889417&width=533)
Strip Planking 31: Smoothing the Hull Interior ...
Nick Schade writes: The concave shape of the interior is more difficult to smooth than the exterior. The easiest tool to use is a scraper. These scrapers are not card...
Strip Planking 31: Smoothing the Hull Interior ...
Nick Schade writes: The concave shape of the interior is more difficult to smooth than the exterior. The easiest tool to use is a scraper. These scrapers are not card...
![Strip Planking 30: Glassing the Interior of the Coaming [video]](http://clcboats.com/cdn/shop/articles/tip-30.jpg?v=1729123303&width=533)
Strip Planking 30: Glassing the Interior of the...
Nick Schade writes: To this point I have only glassed the outside of the coaming. Now that I have applied carbon fiber to the interior of the hul I can...
Strip Planking 30: Glassing the Interior of the...
Nick Schade writes: To this point I have only glassed the outside of the coaming. Now that I have applied carbon fiber to the interior of the hul I can...
![Strip Planking 29: Laying Carbon Fiber Cloth on the Deck Interior [video]](http://clcboats.com/cdn/shop/articles/tip-29.jpg?v=1729123057&width=533)
Strip Planking 29: Laying Carbon Fiber Cloth on...
Nick Schade writes: Laying carbon fiber is not that different from fiberglass accept that it is black, and stays black. Where fiberglass starts white and becomes transparent when saturated with...
Strip Planking 29: Laying Carbon Fiber Cloth on...
Nick Schade writes: Laying carbon fiber is not that different from fiberglass accept that it is black, and stays black. Where fiberglass starts white and becomes transparent when saturated with...
![Strip Planking 28: Smoothing the Deck Interior [video]](http://clcboats.com/cdn/shop/articles/tip-28.jpg?v=1729121716&width=533)
Strip Planking 28: Smoothing the Deck Interior ...
Nick Schade writes: Unlike the outside where sanding is easy, the inside can be harder to to smooth. I find scrapers are the easiest way to deal with the concave...
Strip Planking 28: Smoothing the Deck Interior ...
Nick Schade writes: Unlike the outside where sanding is easy, the inside can be harder to to smooth. I find scrapers are the easiest way to deal with the concave...
![Strip Planking 27: Fiberglassing the Exterior of the Coaming [video]](http://clcboats.com/cdn/shop/articles/tip-27.jpg?v=1729121404&width=533)
Strip Planking 27: Fiberglassing the Exterior o...
Nick Schade writes: After installing the riser, I glassed the outside, reinforcing the coaming and securely attaching it to the deck. The riser was initially installed using hot-melt glue which...
Strip Planking 27: Fiberglassing the Exterior o...
Nick Schade writes: After installing the riser, I glassed the outside, reinforcing the coaming and securely attaching it to the deck. The riser was initially installed using hot-melt glue which...
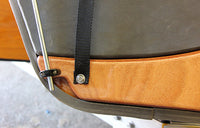
![Strip Planking 26: Installing the Coaming Riser [video]](http://clcboats.com/cdn/shop/articles/tip-26.jpg?v=1729121160&width=533)
Strip Planking 26: Installing the Coaming Riser...
Nick Schade writes: The coaming "riser" is what I call the vertical part of the combing around the cockpit. This is made of the same wood I made the rest...
Strip Planking 26: Installing the Coaming Riser...
Nick Schade writes: The coaming "riser" is what I call the vertical part of the combing around the cockpit. This is made of the same wood I made the rest...
![Strip Planking 25: Fixing a Broken Seam [video]](http://clcboats.com/cdn/shop/articles/tip-25.jpg?v=1729120781&width=533)
Strip Planking 25: Fixing a Broken Seam [video]
Nick Schade writes: While rolling out the fiberglass before glassing the deck, I ended up cracking a section on the back. The break was along a glue line. To fix...
Strip Planking 25: Fixing a Broken Seam [video]
Nick Schade writes: While rolling out the fiberglass before glassing the deck, I ended up cracking a section on the back. The break was along a glue line. To fix...
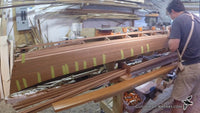
![Strip Planking 24: Fairing and Glassing the Deck [video]](http://clcboats.com/cdn/shop/articles/tip-24.jpg?v=1729120627&width=533)
Strip Planking 24: Fairing and Glassing the Dec...
Nick Schade writes: This largely time-lapse video starts out with scraping and proceeds through sanding to glassing and finishing with a fill coat. I've found a good source of high...
Strip Planking 24: Fairing and Glassing the Dec...
Nick Schade writes: This largely time-lapse video starts out with scraping and proceeds through sanding to glassing and finishing with a fill coat. I've found a good source of high...
![Strip Planking 23: Cutting the Cockpit Recess [video]](http://clcboats.com/cdn/shop/articles/tip-23.jpg?v=1729119800&width=533)
Strip Planking 23: Cutting the Cockpit Recess [...
Nick Schade writes: I like to put what I call a "recess" around the cockpit. On some boats, like these microBootleggers, the recess is not all that recessed, i.e. the...
Strip Planking 23: Cutting the Cockpit Recess [...
Nick Schade writes: I like to put what I call a "recess" around the cockpit. On some boats, like these microBootleggers, the recess is not all that recessed, i.e. the...
![Strip Planking 22: Straightening a Crooked Seam [video]](http://clcboats.com/cdn/shop/articles/tip-22.jpg?v=1729119614&width=533)
Strip Planking 22: Straightening a Crooked Seam...
Nick Schade writes: After carefully stripping the back deck, I notice the feature line had a funny bump in it. I used 2" wide strips on the back deck and...
Strip Planking 22: Straightening a Crooked Seam...
Nick Schade writes: After carefully stripping the back deck, I notice the feature line had a funny bump in it. I used 2" wide strips on the back deck and...
![Strip Planking 21: Stripping the Back Deck [video]](http://clcboats.com/cdn/shop/articles/tip-21.jpg?v=1729111912&width=533)
Strip Planking 21: Stripping the Back Deck [video]
Nick Schade writes: The back deck of the microBootlegger has two "chines" or hard knuckles on each side and a relatively flat area in between. Like stripping the bottom earlier...
Strip Planking 21: Stripping the Back Deck [video]
Nick Schade writes: The back deck of the microBootlegger has two "chines" or hard knuckles on each side and a relatively flat area in between. Like stripping the bottom earlier...
![Strip Planking 20: Installing a Center Accent Line on the Deck [video]](http://clcboats.com/cdn/shop/articles/tip-20.jpg?v=1729106536&width=533)
Strip Planking 20: Installing a Center Accent L...
Nick Schade writes: I want a light colored accent strip running down the center line of the foredeck. Depending on how the strips line up at the bow, his strip...
Strip Planking 20: Installing a Center Accent L...
Nick Schade writes: I want a light colored accent strip running down the center line of the foredeck. Depending on how the strips line up at the bow, his strip...
![Strip Planking 19: Releasing Forms in Staple Free Construction [video]](http://clcboats.com/cdn/shop/articles/tip-19.jpg?v=1729104982&width=533)
Strip Planking 19: Releasing Forms in Staple Fr...
Nick Schade writes: I used hot-melt glue to install the strips, this let me avoid putting staples in the strips. But now the boat is glued to the forms. Before...
Strip Planking 19: Releasing Forms in Staple Fr...
Nick Schade writes: I used hot-melt glue to install the strips, this let me avoid putting staples in the strips. But now the boat is glued to the forms. Before...
![Strip Planking 18: Trimming off the Excess Glass [video]](http://clcboats.com/cdn/shop/articles/tip-18.jpg?v=1729106547&width=533)
Strip Planking 18: Trimming off the Excess Glas...
Nick Schade writes: After you have wet out the fiberglass and the epoxy has set, you can trim off the excess 'glass. This is easiest done as soon as the...
Strip Planking 18: Trimming off the Excess Glas...
Nick Schade writes: After you have wet out the fiberglass and the epoxy has set, you can trim off the excess 'glass. This is easiest done as soon as the...
![Strip Planking 17: The Cotton Swab Test [video]](http://clcboats.com/cdn/shop/articles/tip-17.jpg?v=1729103943&width=533)
Strip Planking 17: The Cotton Swab Test [video]
Nick Schade writes: When is the best time to apply the next coat of resin? It all depends. But if your schedule allows, you will get the strongest bond when...
Strip Planking 17: The Cotton Swab Test [video]
Nick Schade writes: When is the best time to apply the next coat of resin? It all depends. But if your schedule allows, you will get the strongest bond when...
![Strip Planking 16: Removing White Glue Lines [video]](http://clcboats.com/cdn/shop/articles/tip-16.jpg?v=1729095193&width=533)
Strip Planking 16: Removing White Glue Lines [v...
Nick Schade writes: Sometimes when you are using carpenters glue between strips, you will end up with white glue lines. These lines are typically due to the glue being too...
Strip Planking 16: Removing White Glue Lines [v...
Nick Schade writes: Sometimes when you are using carpenters glue between strips, you will end up with white glue lines. These lines are typically due to the glue being too...
![Strip Planking 15: Fiberglassing the Hull [video]](http://clcboats.com/cdn/shop/articles/tip-strip-planking.jpg?v=1753291269&width=533)
Strip Planking 15: Fiberglassing the Hull [video]
Nick Schade writes: This video shows the fiberglassing of the hull of the microBootlegger. I'm applying one layer of 4 ounce E-glass with a coat of epoxy resin. After the...
Strip Planking 15: Fiberglassing the Hull [video]
Nick Schade writes: This video shows the fiberglassing of the hull of the microBootlegger. I'm applying one layer of 4 ounce E-glass with a coat of epoxy resin. After the...
![Strip Planking 14: Sanding the Hull [video]](http://clcboats.com/cdn/shop/articles/tip-sanding_hull.jpg?v=1729040621&width=533)
Strip Planking 14: Sanding the Hull [video]
Nick Schade writes: If you are careful gluing up your strips, the sanding can go quite quickly. My process here was: Scrape the Glue Rough Sand with 60 grit using...
Strip Planking 14: Sanding the Hull [video]
Nick Schade writes: If you are careful gluing up your strips, the sanding can go quite quickly. My process here was: Scrape the Glue Rough Sand with 60 grit using...
![Strip Planking 13: Closing the Bottom [video]](http://clcboats.com/cdn/shop/articles/tip-closing-the-bottom.jpg?v=1729040232&width=533)
Strip Planking 13: Closing the Bottom [video]
Nick Schade writes: The last strip to close the bottom always takes time. The narrow remaining gap must be matched quite precisely for a tight fit. Part of the difficulty...
Strip Planking 13: Closing the Bottom [video]
Nick Schade writes: The last strip to close the bottom always takes time. The narrow remaining gap must be matched quite precisely for a tight fit. Part of the difficulty...
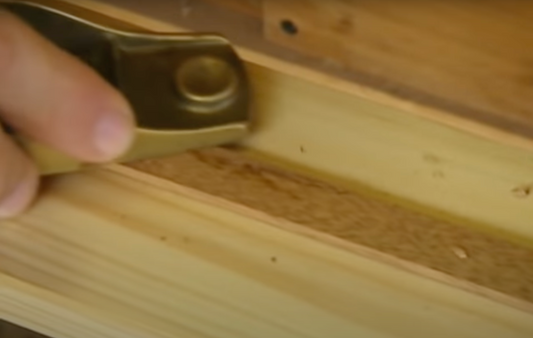
Strip Planking 12: Repairing a Damaged Strip [v...
Nick Schade writes: With book matched strips you can not throw out a damaged strip because doing so would disrupt the pattern of the grain. Instead you will need to...
Strip Planking 12: Repairing a Damaged Strip [v...
Nick Schade writes: With book matched strips you can not throw out a damaged strip because doing so would disrupt the pattern of the grain. Instead you will need to...