
Builders' Forum |
|
| ↓ Scroll to Last Comment ↓ | Forum Guidelines | Builders' Forum | |
shearwater sport hatch locations
New builder question:
I'm building a S&G shearwater sport from a kit, and a bit unsure about locating the hatch positions. The manual says to use the inside edge of the hatch sill spacers as the template for the hatch openings, and to slide the spacer along the deck until these edges are even (I assume this means inline) with the edges of the [Sapele] centre portion of the deck.
So far I haven't looked at the aft hatch, but what's confusing me with the forward, is that if I locate the sill spacer at this position it's going to run into the location of one of the deck forms. These forms are temporary, so it shouldn't really matter that they would be sawed through when the hatch opening is cut, but there's no comment about this in the manual, and I'm wondering if I'm misinterpreting something. The location also looks like the deck sill will be too wide and will need to be cut back quite a bit (not just bevelled) to fit on the underside of the deck at this point, although this is hard to just at the moment, before I've got the deck off again...
(I'll try to add a photo of the location - not that the image really adds a lot)

3 replies:
RE: shearwater sport hatch locations
Hi RA,
i have not built the shearwater sport, but did build the shearwater 17. and i recall the points you raised above on that build too....interference with temp forms and the sill needing to be cut back, not just beveled..
looks like you are proceeding well...as you mentioned, keep the focus on the outside tha that is all neet....and you can sort out the insides for little things like tear out and adjusting spacers and sills.
below is picture - not particularly good of sills/spacers getting lined up on the underside and you can see they go right into the deck side panels...and as you mentioned, it was, i recall....a bit more than beveling required to get them to lie flat.
i would also highlight in this build (and i think it is called out in the instructions) that you want to ensure as part of your filleting of the deck that you temporarily join deck and hull before the fillets cure to ensure that the deck and hull are locked into a shape that can eventually be put back together. i performed he same 'temporary' taping when i installed the spacers and sill to ensure i continued to build out the construction in a way that the deck and hull are ensured to be able to meet up. there is a very natural tendency for the deck or hull to relay and widen out....and adding the spacers and sill, will continue to 'lock in' the shape you ultimately have to work with.
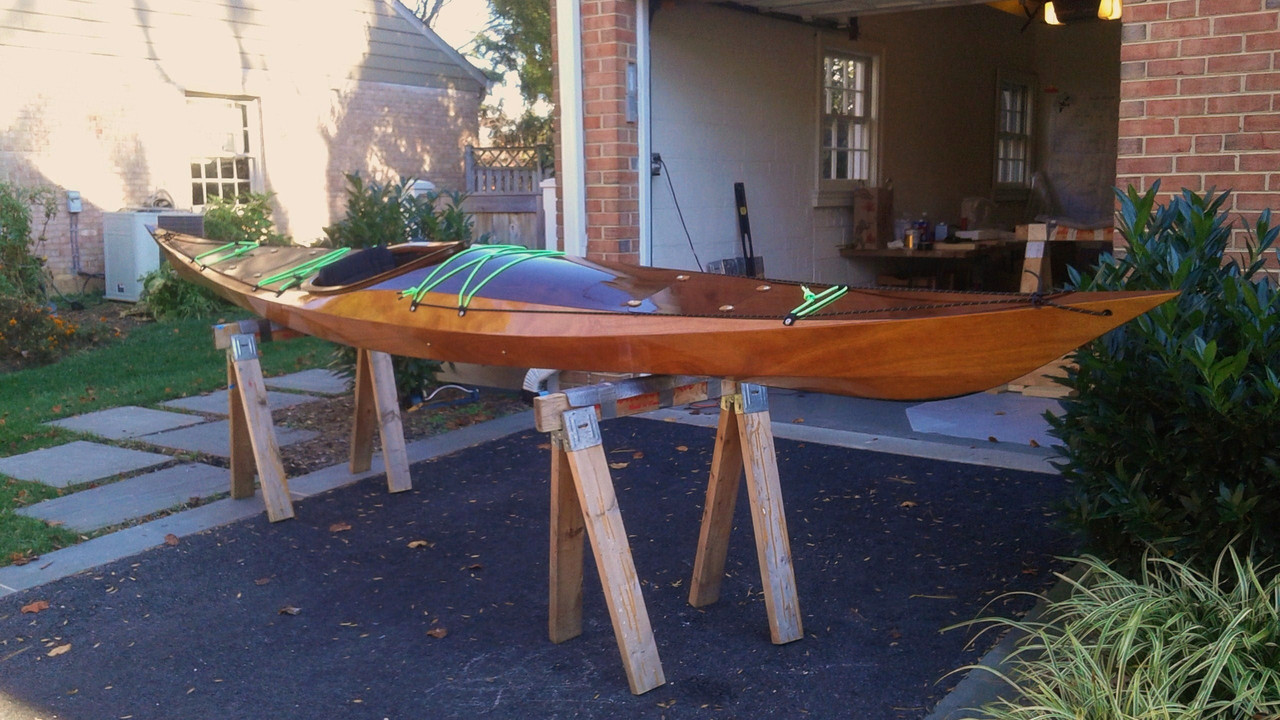
here is picture of final .....shearwaters are really attractive boats...regardless of the model
 keep up the good work.
h
RE: shearwater sport hatch locations
Thanks for the confirmation :) Yes, manual is pretty clear about the importance of locking hull/deck together as epoxy cures, so I'll be sure to keep with those guidelines (so far the only glue involved is with tack welds, but fillets are just around the corner...)
I think I've come across your pic of finshed build before - it's a beauty!


RE: shearwater sport hatch locations
» Submitted by rachelp - Sat, 6/15/24 » 6:52 AM
As a followup:
I cut hatches today, and although the hatch build hasn't been started, all the pieces/locations seem to make sense and I think will fit okay.
No issues with the aft hatch.
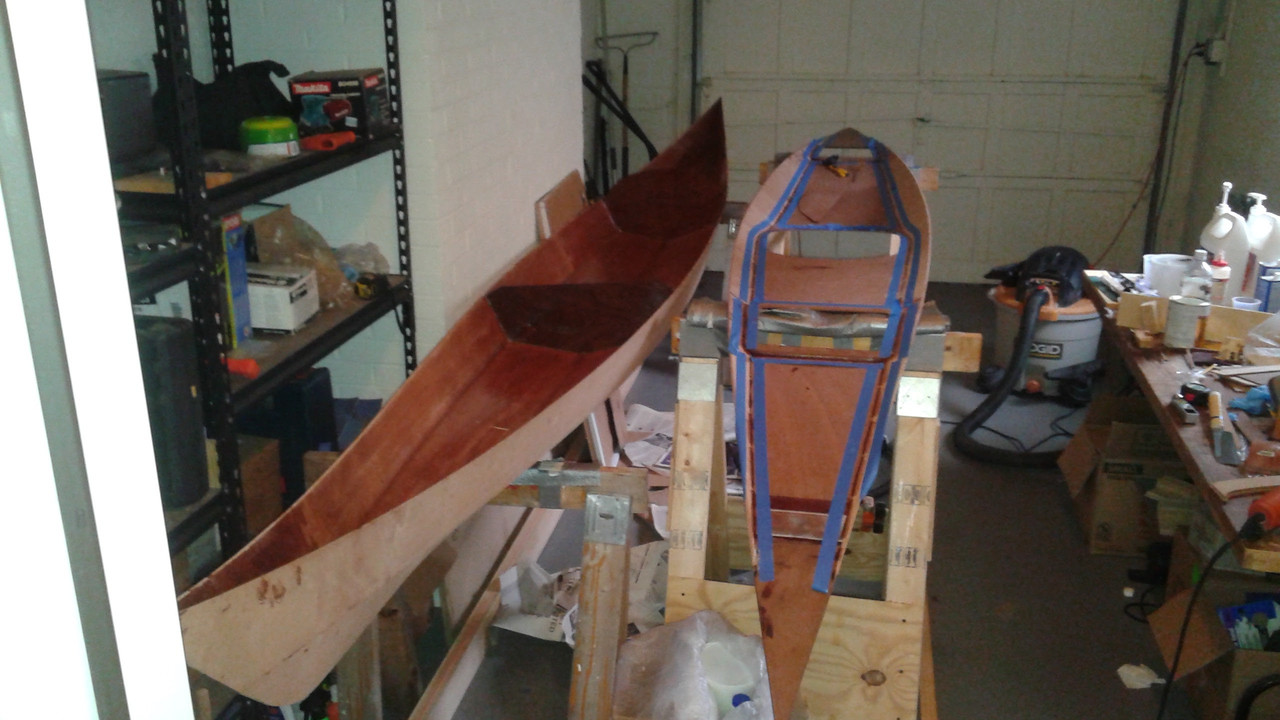
The fwd hatch openning location did seem to interfer with both the temporary deck form (along its aft edge - in the picture below you can see the traceline, and the location of the drill holes for the wires that held the temp form), and the temporary bulkhead (along the fwd edge):
I pulled the wires on the deck form before starting the cut, because I thought there might be some collision issues with the saw blade, based on the traced line from the sill spacer. The form was pushed out of the way by the time I completed the cut. I didn't actually think about the temp bulkhead until I ran into it, but was able to cut carefully 'over' it without loosening any more wires, since this component doesn't make contact with the deck anyway.
Used a bonsai saw, and was overall happy with the process. a bit of tearing on the underside of the cut, but no cosmetic issues on the top surface.